Looking to enhance your New Bedford, Massachusetts property with a new fence? This comprehensive guide is tailored for do-it-yourself enthusiasts seeking to install their own fence. We’ll walk you through the process, from preparing your yard to selecting the perfect fence type and design, assembling and installing it step-by-step, and wrapping up with final touches and maintenance tips. Elevate your outdoor space – read on for expert advice tailored to New Bedford homeowners.
- Prepare Your New Bedford Property for Fencing Installation
- Choosing the Right Fence Type and Design for Your Yard
- Step-by-Step Guide to DIY Fence Assembly and Installation
- Final Touches and Maintenance Tips for Longevity of Your Fence
Prepare Your New Bedford Property for Fencing Installation
Before installing a fence on your New Bedford property, there are several important preparation steps to ensure a smooth and successful project. Start by clearing the area where the fence will be placed, removing any vegetation, debris, or existing structures that may interfere. This includes trimming trees, shrubs, and hedges within the fence line, as well as taking down old fences or gates.
Next, assess the property’s topography and mark out the desired fence location using stakes and string to ensure a straight and level path. Check local regulations and building codes regarding fence installation, obtaining any necessary permits beforehand. Additionally, inspect your property for utility lines or other underground obstructions that could impact the fence placement, calling in professionals to mark these out if required.
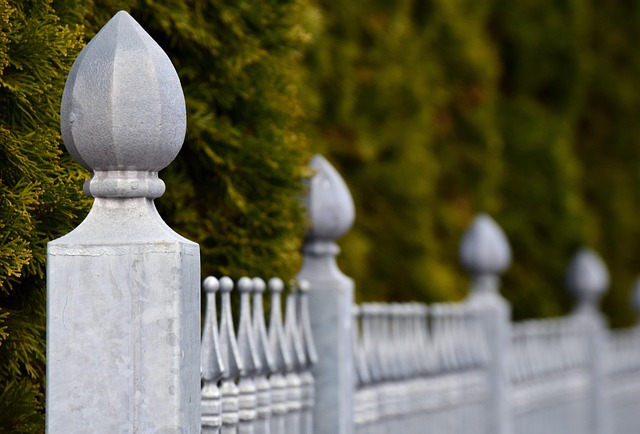
Choosing the Right Fence Type and Design for Your Yard
When selecting a fence type, consider your yard’s unique characteristics. For instance, if privacy is a priority, opt for tall fences with dense foliage or solid panels. For aesthetic appeal, a decorative iron fence might suit your taste, enhancing your New Bedford, Massachusetts property’s curb appeal.
Take into account the surrounding landscape and existing structures. A low, open-top fence could work well in a spacious, open yard, while a more intricate design with trellises can add charm to a smaller, formal garden. Local climate and weather conditions should also guide your choice; durable materials like wood or vinyl are suitable for Massachusetts’ changing seasons.
Step-by-Step Guide to DIY Fence Assembly and Installation
Before tackling your DIY fence installation, gather all necessary materials, including posts, rails, panels, concrete, tools like a drill, hammer, and measuring tape, along with protective gear. Start by marking out the perimeter of your desired fence line using string and stakes to ensure a straight and consistent alignment. Dig holes for the posts, ensuring they’re deep enough (typically around one-third to half the post’s height) to provide stability. Place concrete in each hole, allowing it to set completely. Once set, attach horizontal rails securely to the posts, following manufacturer instructions. Then, connect fence panels to the rails using brackets or nails, ensuring a tight fit. Double-check all connections and make any necessary adjustments before celebrating your new fence!
Final Touches and Maintenance Tips for Longevity of Your Fence
After completing the installation, it’s time to focus on the final touches and maintenance to ensure your new fence stands the test of time in New Bedford’s climate. Start by inspecting the entire fence for any loose or damaged components. Tighten any screws or nails using a sturdy screwdriver or hammer, respectively. Ensure all gates and hinges are properly aligned and swing smoothly. Apply a coat of high-quality sealing wax or wood finish to protect the fence from moisture and UV rays, enhancing its longevity. Regular cleaning with a soft brush and garden hose will keep your fence looking fresh. Consider seasonal inspections to catch any potential issues early, allowing for prompt repairs. By maintaining these simple practices, you’ll enjoy a robust and aesthetically pleasing fence for years to come.