New Bedford homeowners looking to install a fence themselves can benefit from these DIY tips tailored for their region’s climate and conditions. This guide covers everything from planning your project, selecting suitable materials, gathering essential tools, to precise measurement and assembly techniques. By following these steps, you’ll be well on your way to creating a durable and aesthetically pleasing fence that enhances your property.
- Planning Your Fence Installation Project
- Choosing the Right Fence Material for New Bedford Climate
- Tools and Equipment Essential for Successful DIY Install
- Measuring and Marking Your Fence Line Accurately
- Digging Post Holes: A Step-by-Step Guide
- Attaching Panels & Gates: Final Assembly Tips
Planning Your Fence Installation Project
Before beginning your DIY fence installation project, take time to plan and prepare. Start by assessing the perimeter of your property to determine the length and type of fence needed. Consider factors like the style of fence (wooden, vinyl, chain-link), local regulations regarding fence heights and materials, and your personal aesthetic preferences. Create a rough sketch or use measuring tools to mark out where the fence will be placed, taking note of any gates or openings required.
Researching different installation techniques and gathering necessary tools and materials is essential. Online tutorials and how-to guides can offer valuable insights, but always consult with local experts or professionals for specific advice tailored to New Bedford’s conditions. Ensure you have the right equipment, including post holes diggers, measuring tapes, hammers, and any specialized tools required for your chosen fence type.
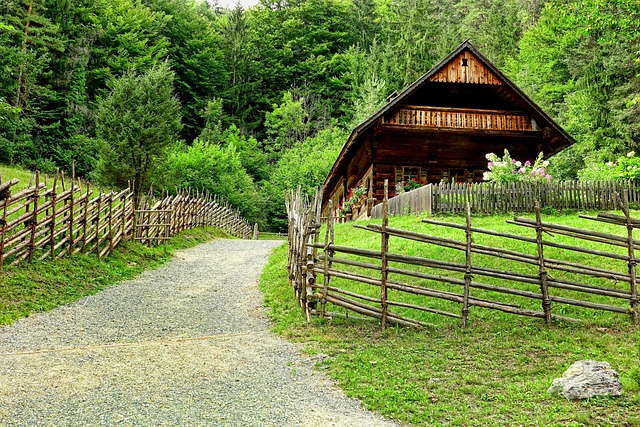
Choosing the Right Fence Material for New Bedford Climate
When considering fence installation in New Bedford, Massachusetts, selecting the appropriate material is key to longevity and visual appeal. The region’s climate presents unique challenges with its cold winters and humid summers. For durable performance, opt for high-quality vinyl or wood fences. Vinyl, known for its low maintenance, resists rot and warping that can occur due to moisture. It also offers a wide range of styles and colors to match any aesthetic preference. Wood, particularly treated varieties, is another excellent choice, providing excellent strength and natural beauty. Consider cedar or pressure-treated pine for resistance against decay and insects, ensuring your fence stands the test of time in New Bedford’s climate.
Tools and Equipment Essential for Successful DIY Install
When taking on a DIY fence installation project in New Bedford, Massachusetts, having the right tools and equipment is paramount to achieving a professional result. Start by gathering essential items like a post-hole digger or auger for drilling holes, a concrete mixer or bucket for mixing cement, and various sizes of drill bits to accommodate different fence post diameters.
Don’t forget protective gear, including safety goggles, gloves, and ear protection. A tape measure, level, and marker will ensure precise measurements and alignment. For cutting and shaping materials, you’ll need a sturdy saw, preferably a circular saw for efficiency, along with a measuring tape to guide your cuts accurately. Having these tools readily available will make the installation process smoother and safer, allowing you to focus on crafting a beautiful new fence for your New Bedford property.
Measuring and Marking Your Fence Line Accurately
When installing a fence, getting the measurements right is crucial to ensure your fence looks neat and professional. Start by identifying the perimeter of the area where you want to install the fence. Use stakes and string to outline the desired fence line, ensuring it aligns with your property lines as marked on your surveys or maps. This step-by-step process will help you determine the exact length of fencing material needed.
Accurate marking is key; even a slight error in measurement can lead to an uneven fence. Consider using a tape measure or a measuring wheel for precise measurements, and mark the ground along the intended fence line with stakes and string to create a clear visual guide for your installation.
Digging Post Holes: A Step-by-Step Guide
To begin digging post holes for your fence, start by identifying the desired location and measuring the area to ensure proper placement. Mark the spots where each fence post will go using stakes and string to create a straight line. Next, use a post-hole digger to excavate the ground, creating holes that are deep enough (typically around 3 feet) and wide enough (about 8 inches in diameter) to accommodate the fence posts. Ensure the soil within the holes is removed evenly and the sides of the holes are smooth to prevent damage to the posts. Before inserting the posts, consider adding a layer of gravel or sand at the bottom of each hole for drainage purposes.
Attaching Panels & Gates: Final Assembly Tips
When attaching fence panels to posts, make sure each panel is level before securing it. Use a level and a pencil to mark any imperfections, then adjust the panel until it’s perfect. A square corner ensures better alignment with adjacent panels, creating a neat, uniform appearance.
For gate installation, measure the opening carefully to ensure a proper fit. Consider adding hinges at the top for easier operation, and don’t forget to install a latch or lock for security. Regularly lubricate hinges to maintain smooth opening and closing, extending the life of your fence gates.