New Bedford, Massachusetts homeowners looking to install a fence have a valuable guide at their disposal. Before breaking ground, understanding local regulations and selecting an appropriate fence type are essential steps. This article provides practical tips for each stage of DIY fence installation, from navigating New Bedford’s fencing rules to finishing touches, ensuring your project is both compliant and successful. By following these steps, you’ll create a secure and aesthetically pleasing addition to your yard.
- Understanding New Bedford's Fencing Regulations
- Choosing the Right Fence Type for Your Yard
- Measuring and Planning Your Fence Layout
- Gathering Essential Tools and Materials
- Digging and Setting Post Holes Accurately
- Attaching Panels and Finishing Touches
Understanding New Bedford's Fencing Regulations
Before installing a fence in New Bedford, Massachusetts, it’s crucial to familiarize yourself with local regulations. The city of New Bedford has specific guidelines and restrictions regarding fencing, including height limits, permitted materials, and installation procedures. Homeowners should review the Building Code and Zoning Regulations to ensure their project complies with these rules.
These regulations are in place to maintain the aesthetic and functional integrity of neighborhoods while also ensuring safety and property value. Understanding and adhering to these guidelines will help avoid fines or legal issues down the line. Check with the New Bedford Department of Planning and Development for up-to-date information and any necessary permits before beginning your DIY fence installation project.
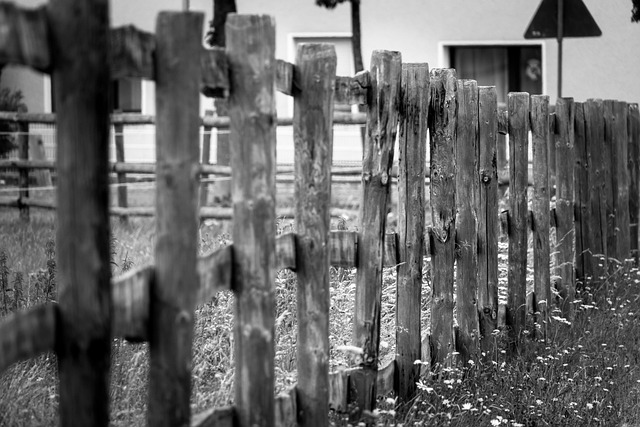
Choosing the Right Fence Type for Your Yard
When considering DIY fence installation, New Bedford homeowners should start by evaluating their yard’s unique characteristics and needs. The right fence type will enhance your outdoor space, providing both functionality and aesthetic appeal. For instance, a wooden fence offers classic charm and can be tailored to various styles, from picket fences for a quaint look to privacy panels for added seclusion. On the other hand, vinyl fencing is low-maintenance and durable, ideal for those seeking a long-lasting, easy-to-care-for option.
Additionally, consider your yard’s layout and surrounding environment. Fences with taller posts and robust materials like steel or concrete are suitable for areas prone to strong winds or potential intruders. For smaller, more intimate yards, a low-lying fence or a decorative metal design might be more appropriate, allowing light and air to circulate while still providing privacy.
Measuring and Planning Your Fence Layout
Before installing a fence, careful measurement and planning are essential to ensure your project goes smoothly. Start by inspecting your property line and determining where you want the fence to be located. Use measuring tape to take accurate dimensions of the area, considering any curves or angles. Mark these points on the ground with stakes and string for visual reference.
Next, decide on the layout of your fence, including the number of posts needed and their spacing. The standard post spacing is every 6-8 feet, but this can vary based on the height and style of your fence. Create a simple sketch or use online tools to plan the exact placement of posts and panels, ensuring it aligns with local building codes and regulations.
Gathering Essential Tools and Materials
Before starting your DIY fence installation project, make sure to gather all the essential tools and materials needed. This typically includes a measuring tape for accurate dimensions, post holes diggers or an electric drill with a hole-drilling bit, a level to ensure proper alignment, and a variety of fencing supplies such as posts, rails, and pickets in your desired style and material (wood, vinyl, or metal). Don’t forget about hardware like brackets, screws, and fasteners specific to the type of fence you’re installing.
Also, consider safety gear for yourself, including work gloves, eye protection, and a hard hat if you plan on digging deep post holes. Having all your tools and materials ready before beginning will not only streamline the installation process but also help ensure that your new fence is sturdy, secure, and aesthetically pleasing.
Digging and Setting Post Holes Accurately
Digging and setting post holes accurately is a crucial step in DIY fence installation. New Bedford, Massachusetts homeowners should aim for a depth of roughly 3 feet to ensure stability against various weather conditions. Use a post-hole digger or an excavator to create holes that are slightly wider than the posts’ diameter to allow for proper spacing and backfilling.
When positioning the holes, consider the fence’s alignment and make sure they’re evenly spaced along the perimeter. Marking the spots beforehand with flags can help maintain precision during excavation. The holes should be deep enough to support the weight of the fence posts without compromising their stability over time.
Attaching Panels and Finishing Touches
Once all the posts are securely in place and the panels are properly aligned, it’s time to attach them. Start by securing the bottom rails to the posts using brackets or nails, ensuring a tight fit. Then, carefully lift each panel into position, aligning it with the existing fence line. Use metal connectors or zip ties to fasten the panels to the rails, creating a sturdy framework. Keep the panels level and ensure all connections are secure.
For the finishing touches, trim any excess material from the panels using a utility knife. Check for any gaps between posts and add filling if necessary. Apply a coat of paint or sealant to protect the fence and enhance its appearance. Regular maintenance, such as cleaning and re-painting, will ensure your DIY fence stands the test of time.