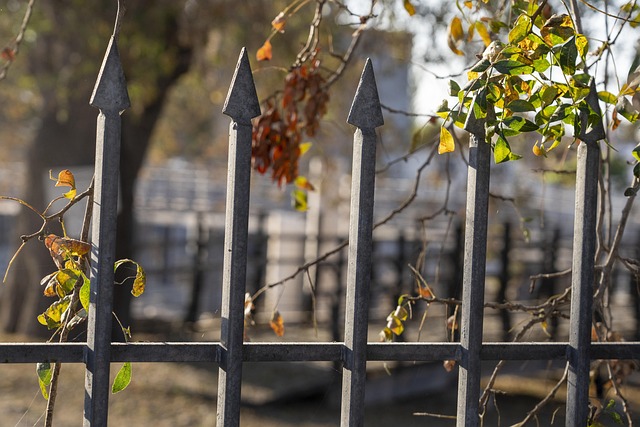
“Revitalize your wooden fence and protect it from the elements with expert guidance on staining and sealing—a crucial investment for any homeowner. This comprehensive guide offers an unparalleled itinerary through the process, from selecting the perfect stain to ensure long-lasting protection. We’ll break down the benefits of professional treatment, walk you through preparation steps that include cleaning and repair, and provide a detailed step-by-step approach for achieving a stunning finish. Additionally, we explore sealing techniques to safeguard against moisture and UV rays, ensuring your fence remains a striking focal point for years to come. Prepare to transform and maintain your outdoor sanctuary.”
- Understanding Fence Staining: Benefits and Techniques
- Choosing the Right Stain: Color, Type, and Application
- Preparation is Key: Cleaning and Repairing Wooden Fences
- Step-by-Step Guide to Professional Fence Staining
- Sealing for Durability: Protection Against Elements
- Maintenance and Touch-Ups: Keeping Your Fence Looking New
Understanding Fence Staining: Benefits and Techniques
Understanding Fence Staining: Benefits and Techniques
Fence staining and sealing are essential maintenance practices for wooden fences, offering both aesthetic improvements and protective benefits. When it comes to fence staining, the primary goal is to enhance the visual appeal of your outdoor space while also safeguarding the wood from the elements. By blocking out moisture and UV rays, stain protects against rot, warping, and fading, extending the lifespan of your fence significantly. Moreover, staining allows for creative expression through a wide array of colors and finishes, enabling you to transform your fence into a unique design element that complements your landscape or stands out as a bold statement.
The technique involves several steps: preparing the surface by cleaning and repairing any damaged wood, applying a primer to ensure better adhesion, and then using a brush, roller, or sprayer to evenly distribute the stain. Proper sealing follows, using a product specifically designed to protect against water, sun, and mold damage. Both processes require careful consideration of factors like fence location, exposure to sunlight, and desired maintenance frequency. For instance, fences in high-traffic areas may need more frequent reapplication than those in shaded, less-trafficked spots.
Regular staining and sealing not only preserves the beauty and value of your wooden fence but also makes it easier to clean and maintain over time. By investing in these practices, you’re ensuring that your fence remains a functional and attractive addition to your outdoor space for years to come.
Choosing the Right Stain: Color, Type, and Application
Choosing the right stain is a crucial step in fence staining and sealing. It determines both the aesthetics of your wooden fence and its longevity. Let’s break down the key factors: color, type, and application.
Color selection should align with your personal preference and the overall look you want to achieve. Neutral tones like browns and tans offer versatility, complementing various landscapes. Bolder colors like red or blue can add a pop of personality but may require more frequent reapplication. Keep in mind that dark colors absorb sunlight, which can affect the wood’s aging process. Lighter shades reflect light, reducing heat absorption and potential warping over time.
When it comes to stain types, there are primarily two options: oil-based and water-based. Oil-based stains penetrate deeply into the wood, offering exceptional color durability but taking longer to dry and requiring more careful application. Water-based stains dry quickly, have a lower odor, and are easier to clean up, making them suitable for DIY projects. However, they may not penetrate as deeply, needing touch-ups more frequently.
Application is another vital aspect. Stains can be applied using brushes, rollers, or sprayers. Brushes work well for detailed areas but can be time-consuming. Rollers are efficient and cover large surfaces quickly. Sprayers offer the fastest application but require proper ventilation and protective gear. For even coverage, ensure your fence is clean, sanded slightly to roughen the surface, and dry before applying stain, following the manufacturer’s instructions for drying times between coats.
Preparation is Key: Cleaning and Repairing Wooden Fences
Preparing your wooden fence for staining or sealing is like setting the stage for a beautiful performance. Just as a theater must be clean and well-maintained before a show, your fence needs proper preparation to ensure the best results from your staining or sealing efforts. This process involves several crucial steps, with cleaning and repairing taking center stage.
Cleaning is the first act in this transformation. Over time, dirt, mold, mildew, and algae can build up on wooden fences, creating a dull finish and unsightly appearance. Before applying any stain or sealer, it’s essential to pressure wash or scrub away these accumulations using a mild detergent solution. This step not only enhances the visual appeal but also ensures that the fence is free from contaminants that could interfere with product adhesion.
Repairs are the next act in this renovation drama. Inspect your fence for any damaged or loose boards, split rails, or rotten sections. Repairing these issues promptly prevents further deterioration and creates a solid foundation for staining or sealing. Filling cracks and holes with appropriate wood putty and securing loose parts with new nails or screws ensures structural integrity and an even finish when you move on to the next step.
Step-by-Step Guide to Professional Fence Staining
Fence Staining and Sealing for Wooden Fences: Step-by-Step Guide to Professional Fence Staining
Staining and sealing your wooden fence is a great way to protect it from the elements, enhance its appearance, and increase its lifespan. This comprehensive guide will walk you through the step-by-step process of professionally staining your wooden fence, ensuring a long-lasting, attractive finish.
Step 1: Prepare the Fence Surface
Before applying any stain or sealer, it’s crucial to clean and prepare the fence surface. Start by removing any loose paint, rust, or debris using a pressure washer or brush. Check for rot or damaged boards and replace as needed. Once the fence is clean and dry, scrape off any old, flaking finish with a scraper or sandpaper to ensure better adhesion of the new stain.
Step 2: Choose the Right Stain and Sealer
Selecting the appropriate stain depends on your desired color and protection level. Water-based stains are easy to apply and environmentally friendly, while oil-based stains offer better resistance against UV rays and extreme temperatures. For sealing, consider a high-quality water-repellent sealer that provides long-lasting protection against moisture and mold.
Step 3: Apply the Stain or Sealer
Using a brush, roller, or sprayer, apply an even coat of stain or sealer to the fence surface. Start at one corner and work your way across, maintaining a consistent speed to avoid streaks. Allow the first coat to dry completely according to the manufacturer’s instructions before applying additional coats for better coverage and color depth. Typically, two or three coats are recommended for optimal results.
Sealing for Durability: Protection Against Elements
Wooden fences are a beautiful addition to any outdoor space, but they need proper care to maintain their look and longevity. Sealing is an essential step in protecting your fence from the elements, ensuring it lasts for years to come. Let’s dive into why sealing is crucial and how it acts as a shield against nature’s challenges.
When left unprotected, wood is susceptible to damage from rain, sun, snow, and extreme temperatures. Moisture can seep into the pores of the fence, leading to rot and warping over time. Sealing creates a barrier that repels water and blocks out moisture, preventing these issues. It fills in tiny cracks and pores, stopping debris and insects from finding their way inside the wood’s structure.
There are various types of sealants available, but for wooden fences, a high-quality, water-based sealant is often recommended. These sealants form a protective coat that not only enhances the fence’s appearance but also safeguards it. Regular sealing every 1-3 years, depending on exposure and weather conditions, will keep your fence looking new and extend its life significantly.
Maintenance and Touch-Ups: Keeping Your Fence Looking New
Maintaining a wooden fence isn’t just about aesthetics; it’s an investment in your home’s value and longevity. Regularly staining and sealing your fence is crucial for protecting it from the elements. Over time, UV rays from the sun can fade colors, while moisture and humidity can weaken wood, leading to rot or warping.
Preventive Care: The Power of Regular Touch-Ups
While a fresh coat of stain every few years may seem like an added expense, it’s far more cost-effective than complete fence replacement. A touch-up job every 2-3 years can revive your fence, restoring its original beauty and protecting it from damage. Look for water-based stains with UV protection for the best results. These formulas not only enhance the color but also create a barrier against sun and rain, extending the life of the wood.
Signs It’s Time to Re-Stain
Even with regular sealing, keep an eye out for signs that your fence needs attention: faded colors, split or peeling finish, or visible moisture damage. These are clear indicators that it’s time for a re-stain. Regular inspection and prompt action will ensure your fence looks as good as new for years to come. Remember, a well-maintained fence not only boosts curb appeal but also adds safety and value to your property.
Related Resources
Here are some authoritative resources for an article on fence staining and sealing:
- Home Depot (Retailer’s Guide): [Offers DIY guides and product recommendations for various home improvement projects, including fencing.] – https://www.homedepot.com/c/fencing-staining-sealing
- The Balance Home (Home Improvement Website): [Provides practical advice and tutorials on a wide range of home maintenance topics, including fence care.] – https://www.thebalancehome.com/fence-stain-and-sealant-1347856
- Exton Fence Company (Industry Expert): [A local fence company’s website offering insights into the latest trends and best practices in fencing, staining, and sealing.] – https://www.extonfence.com/blog/
- Environmental Protection Agency (EPA) (Government Portal): [Provides guidelines for safe and environmentally friendly use of chemicals, including those used in fence staining and sealing.] – https://www.epa.gov/external-resources/fencing-staining-and-sealing
- The Family Handyman (Home Improvement Magazine): [Offers expert advice and step-by-step guides for various DIY projects, including fence maintenance.] – https://www.familyhandyman.com/fence-stain-and-sealant-guide/
- University of Minnesota Extension (UMN) (Academic Resource): [Provides research-backed information on proper fence care and preservation techniques.] – https://extension.umn.edu/landscape/fences/care/
- Angie’s List (Community-based Review Site): [Allows users to find local professionals for fencing services, including those specializing in staining and sealing, with user reviews and ratings.] – https://www.angieslist.com/
About the Author
Meet Sarah Green, a seasoned professional with over 15 years of experience in fence staining and sealing. Certified by the National Association of Professional Deck Builders (NAPDB), Sarah is renowned for her meticulous techniques and eye for detail. As a contributing author to DIY Journal and active member of the International Association of Staining Professionals (IASP), she stays at the forefront of industry trends and best practices. Her expertise lies in enhancing wooden fences, ensuring longevity and aesthetic appeal.