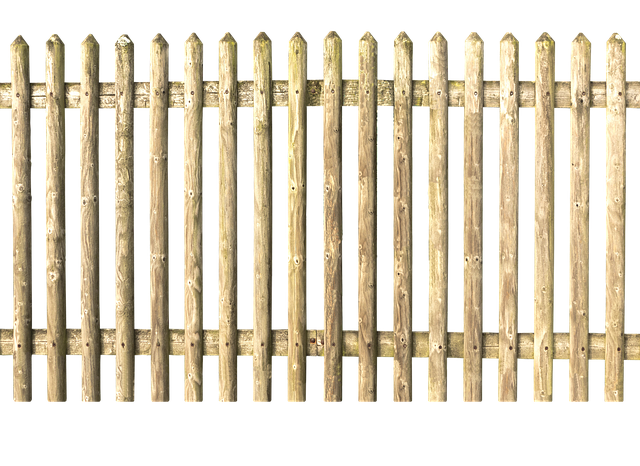
Wooden fences stand as silent guardians around homes, offering privacy and a warm welcome to visitors. To preserve their natural beauty and protective function, regular maintenance through staining and sealing is paramount. This article delves into the essentials of preparing your wooden fence for a lasting finish, guiding you in selecting the ideal stain and sealant tailored to your fence’s material. With a detailed step-by-step application process, we ensure your fence not only withstands the elements but also enhances its aesthetic appeal. Further, maintaining your stained and sealed fence over time is simplified with practical tips to extend its lifespan and prevent common issues that can arise during this process. Let’s explore how to safeguard one of your home’s most overlooked assets and transform the ordinary into the extraordinary with a touch of care and precision.
- Preparing Your Wooden Fence for Staining and Sealing
- Choosing the Right Stain and Sealant for Your Fence's Material
- Step-by-Step Guide to Applying Stain and Sealant Effectively
- Maintaining Your Stained and Sealed Fence Over Time
- Troubleshooting Common Issues with Fence Staining and Sealing
Preparing Your Wooden Fence for Staining and Sealing
Prior to staining and sealing your wooden fence, it is imperative to prepare the surface properly to ensure an even application and long-lasting finish. Begin by thoroughly inspecting the fence for any signs of damage or decay. Any rotted or splintered wood should be repaired or replaced to prevent moisture from infiltrating and causing further damage post-staining. Next, clean the fence with a pressure washer or a brush and soapy water to remove dirt, debris, and old finish. This will allow the stain or sealer to adhere better and produce a more uniform appearance. Once the fence is clean and dry, lightly sand the surface with fine-grit sandpaper to remove any splinters and smooth over rough spots. After sanding, wipe down the entire fence with a damp cloth to remove all the dust. It’s crucial to let the fence dry completely before proceeding to stain or seal; this typically takes 24 to 48 hours depending on environmental conditions.
With the wooden fence properly prepared, you can now select the appropriate stain or sealer based on your desired finish and the type of wood used. Apply a high-quality wood stain or sealer, following the manufacturer’s instructions closely. Ensure that the product is compatible with your type of wood and intended for exterior use to protect against UV rays and weather elements. Apply the stain or sealer evenly, working in sections to avoid overlap or excess application. Allow the product to dry as per the manufacturer’s recommendations before applying a second coat if necessary, to ensure full coverage and protection. Regular maintenance after staining and sealing will further prolong the life of your wooden fence, maintaining its aesthetic appeal and functionality for years to come.
Choosing the Right Stain and Sealant for Your Fence's Material
When selecting a stain and sealant for your wooden fence, it’s crucial to consider the type of wood and the climate conditions in which it resides. Different wood species absorb stains differently; for instance, cedar and redwood are naturally weather-resistant and may not require a transparent stain to maintain their beauty. However, softwoods like pine might benefit from a semi-transparent or solid stain that can provide additional protection against the elements. The climate also plays a significant role in determining the right product; in moist environments, waterproofing sealants are essential to prevent rot and decay. Conversely, in areas with high UV exposure, a stain with UV blockers will help prevent sun bleaching and extend the life of your fence.
The choice between a clear stain and a semi-transparent or solid stain should be based on your desired aesthetic as well as the wood’s natural oils and grain patterns. Clear stains enhance the natural look of the wood without obscuring the grain, making them ideal for woods that have a strong character, like oak or walnut. On the other hand, semi-transparent and solid stains offer more coverage, which can mask imperfections and provide a uniform appearance, especially on raw or unfinished wood. Always opt for products that are specifically designed for exterior use and carry reputable certifications for longevity and performance. Additionally, consider eco-friendly options that are low in volatile organic compounds (VOCs) to minimize environmental impact and ensure a safer application process. By carefully selecting the right stain and sealant based on your fence’s material and environmental factors, you can protect and maintain its appearance for years to come.
Step-by-Step Guide to Applying Stain and Sealant Effectively
Before beginning the staining and sealing process, thoroughly inspect your wooden fence for any necessary repairs or cleaning. Use a mild detergent solution to wash the fence, rinse it with a pressure washer set to a low-pressure setting to remove any dirt, mildew, or old finish. Allow the fence to dry completely before applying stain and sealant.
Once the fence is clean and dry, select an appropriate stain and sealant compatible with the wood type and your climate. Apply a high-quality primer or stain blocker to any areas that have previously been stained or painted to ensure even absorption. Begin staining by applying the stain with a high-quality brush or sprayer, working in sections from top to bottom to prevent drips and overlapping strokes for consistent coverage. Let the stain dry according to the manufacturer’s instructions before applying the sealant. When applying the sealant, use a separate brush or sprayer to ensure that no stain residue interferes with the sealant’s application. Apply the sealant in a similar manner to the stain, ensuring full coverage and attention to the wood grain direction for optimal appearance. Allow the sealant to dry as per the product guidelines; this may require several hours or even overnight. Multiple light coats are preferable to one heavy coat to avoid runs and excess buildup. After the sealant has fully cured, your wooden fence will be protected from weather elements, pests, and wear, maintaining its appearance and structural integrity for years to come.
Maintaining Your Stained and Sealed Fence Over Time
To maintain a wooden fence that has been stained and sealed, it’s crucial to perform regular maintenance checks. These checks include inspecting the fence for any signs of wear, such as peeling, cracking, or discoloration, which can be indicative of weather exposure or age. If any issues are detected, they should be addressed promptly to prevent further damage. Routine cleaning is also a key component of maintenance. Using a mild detergent solution and a soft-bristled brush, gently clean the fence to remove dirt, debris, and any growths like moss or algae that can mar its appearance and protect its integrity.
For stained and sealed fences, reapplication of stain and sealant is necessary to preserve the wood’s condition over time. The frequency of reapplication depends on factors such as the type of wood, the climate, and the level of exposure to sunlight and moisture. Typically, a stain or sealant should be applied every 2 to 3 years, but this can vary. Before reapplying, ensure the previous coating is worn off, as fresh stain needs a clean surface to adhere properly. When reapplying, follow the manufacturer’s instructions for optimal results, and consider using a semi-transparent or solid stain for added protection. This proactive approach will help your fence endure environmental elements, maintain its aesthetic appeal, and prolong its lifespan.
Troubleshooting Common Issues with Fence Staining and Sealing
When encountering common issues with fence staining and sealing, it’s crucial to address them promptly to maintain the longevity and appearance of your wooden fence. One prevalent problem is uneven stain application, which can occur due to weather conditions or improper equipment. To remedy this, ensure that all surfaces are clean and dry before applying the stain. Use a high-quality brush or sprayer suited for the project, and apply the product consistently across all sections of the fence. If the stain appears too dark or the color is not as expected, it may be due to multiple layers of old stain interfering with the new application. In such cases, stripping back some layers with a wood stripper or cleaner can help achieve the desired shade and coverage.
Another common issue is the sealing process, where homeowners might notice peeling or cracking. This typically happens when the previous sealant has degraded over time due to environmental factors like sunlight or moisture. To resolve this, thoroughly clean the fence to remove any loose material. Select a high-quality sealer that’s compatible with the type of wood used in your fence and apply it evenly. If bubbles form during sealing, use a brush to spread the sealant out smoothly. For areas that remain unsealed, apply additional coats as needed, allowing sufficient drying time between applications. Regular maintenance after staining and sealing can prevent future issues, ensuring your wooden fence remains protected and attractive for years to come.