When it comes to safeguarding and enhancing the longevity of your wooden fence, understanding the nuances of fence staining and sealing is paramount. This comprehensive guide delves into the critical aspects of selecting the optimal stain for various wood types, preparing your fence for the application process, and executing a step-by-step procedure for effective staining. Furthermore, we’ll elucidate the essential steps to seal your fence for lasting protection and offer maintenance tips to preserve its color vibrantly over time. By heeding these guidelines, your wooden barrier will not only stand as a boundary but also as a testament to your commitment to property upkeep and aesthetic appeal. Additionally, we’ll highlight common pitfalls to avoid in the process, ensuring your fence remains protected and visually pleasing for years to come.
- Choosing the Right Stain for Your Wooden Fence
- Preparing Your Fence for Staining and Sealing
- Step-by-Step Guide to Effective Fence Staining
- Sealing Your Fence: Protection and Maintenance
- Tips for Maintaining Fence Color Over Time
- Common Mistakes to Avoid in Fence Staining and Sealing
Choosing the Right Stain for Your Wooden Fence
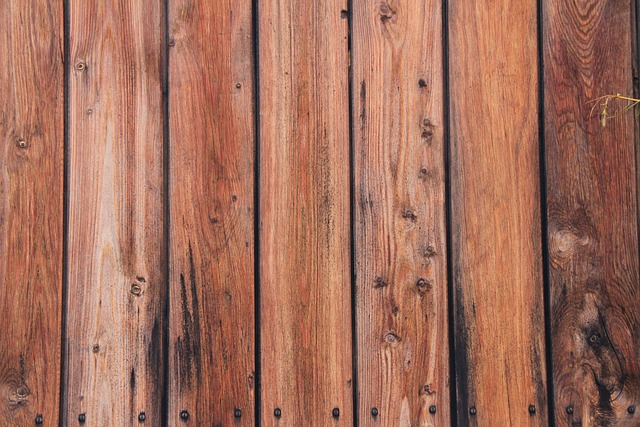
When selecting a stain for your wooden fence, it’s crucial to consider several factors to ensure the stain not only enhances the wood’s natural beauty but also provides lasting protection against environmental elements. The type of wood used in your fence is one of the primary determinants of stain selection; different woods absorb stains at varying rates and may require specific formulations for optimal penetration and coverage. For instance, softwoods like cedar or pine typically accept stains differently than hardwoods such as oak or mahogany. Additionally, the climate in which your fence is situated plays a significant role. In regions with high humidity or intense sunlight, opting for a stain with UV protectants will help prevent fading and maintain the wood’s integrity over time. Clear stains can bring out the wood’s grain without adding color, while semi-transparent or solid stains offer more hiding power and protection against moisture. Oil-based stains tend to penetrate deeper into the wood, providing a more natural appearance and resistance to water, whereas water-based options are often preferred for their low odor, quicker drying times, and lower environmental impact. It’s advisable to test any stain on a small, inconspicuous area of the fence first to ensure it achieves the desired effect without causing unforeseen issues with adherence or color alteration. By carefully selecting the right stain for your wooden fence based on these considerations, you can maintain its appearance and prolong its lifespan effectively.
Preparing Your Fence for Staining and Sealing
Before commencing with the staining and sealing process, it is imperative to prepare your wooden fence thoroughly. Begin by inspecting the entire structure for any necessary repairs. Address all damage, such as splintered wood or loose pickets, to ensure a smooth finish. Clean the fence with a mild detergent solution or a pressure washer set to a low-pressure mode to remove dirt, mildew, and debris. This step is crucial for achieving optimal adhesion and penetration of the stain or sealer, allowing for a more uniform appearance and longevity.
Once the fence is clean and any repairs have been made, allow it to dry completely. The type of wood, climate conditions, and environmental factors will dictate drying time. After the fence is dry, lightly sand all surfaces with fine-grit sandpaper to remove any splinters, rough spots, or old finish. Brushing off dust with a soft-bristle brush or a tack cloth ensures a clean surface for staining and sealing. Applying a high-quality wood preservative or a stain-blocking primer can further protect the wood and improve the effectiveness of the stain or sealant you choose to apply.
Step-by-Step Guide to Effective Fence Staining
1. To maintain the longevity and aesthetic appeal of your wooden fence, regular staining and sealing are pivotal. Begin by thoroughly cleaning the fence with a mild detergent and a soft-bristle brush to remove any dirt, mildew, or debris. Rinse it thoroughly with a garden hose to ensure all soap residues are gone. Allow the fence to dry completely before proceeding. Next, choose a quality stain that not only enhances the wood’s natural beauty but also provides ample protection from the elements. Apply a stain-blocking primer if necessary, especially on surfaces that have significant weathering or previous stains. Follow the manufacturer’s instructions for application, using a high-quality natural bristle brush, foam brush, or sprayer to apply the stain evenly. Work in sections, starting at the top and moving downward to avoid overlapping strokes which can cause a dark line of excess product. Let the first coat dry according to the product’s drying time before applying a second coat for full coverage and protection.
2. After the final coat has dried, inspect the fence to ensure all areas are evenly stained and protected. If any spots appear lighter or uncovered, apply additional stain as needed. Allow the stain to cure for the time recommended by the manufacturer before using the fence or exposing it to harsh weather conditions. Regular maintenance includes reapplying stain every one to three years, depending on exposure to sunlight and weather, to keep the wood in top condition. Properly maintained stained fences not only last longer but also continue to serve their purpose of privacy, security, and enhancing your property’s curb appeal. Remember to select a stain that matches the type of wood and the level of protection you desire; some stains offer UV protection while others have waterproofing properties. Adhering to these steps will ensure your wooden fence remains in excellent condition for years to come.
Sealing Your Fence: Protection and Maintenance
Regular maintenance of wooden fences is crucial for their longevity and aesthetic appeal. Sealing your fence serves a dual purpose: it protects the wood from environmental elements and preserves its natural beauty. Exposure to UV rays, rain, snow, and temperature fluctuations can cause wood to warp, splinter, or rot over time. A quality sealant acts as a barrier, safeguarding the wood against these detrimental effects. It’s recommended to apply a sealant soon after staining for optimal protection. Sealants come in various forms, including transparent and tinted options, allowing you to enhance the wood’s natural look or match it with your home’s color scheme. The process of sealing should be carried out meticulously, paying close attention to all nooks and crannies where moisture can penetrate and cause damage. This not only extends the fence’s lifespan but also ensures that it remains a functional boundary for your property, standing up to the test of time and weather. Remember to follow the manufacturer’s instructions for the best results and to repeat the process every few years or as needed based on exposure conditions and wear. Regularly inspecting and maintaining your wooden fence through sealing will reward you with a protective and visually pleasing barrier that complements your outdoor space effectively.
Tips for Maintaining Fence Color Over Time
To maintain the vibrancy and protection of your wooden fence over time, regular maintenance is key. Begin by thoroughly cleaning your fence annually using a mild detergent solution or a wood-safe cleaner to remove dirt, pollen, and other debris. This will ensure that any new stain or sealant adheres properly to the wood’s surface. After cleaning, choose a high-quality stain or sealer that offers both UV protection and water resistance. These products help prevent color fading from sunlight exposure and swelling from moisture intrusion. Apply the product evenly, following the manufacturer’s instructions, and allow it to dry completely before assessing if a second coat is necessary for optimal coverage. Keep in mind that some colors may fade faster than others under direct sunlight; opting for more sun-resistant shades can extend the life of your fence’s color. Additionally, inspect your fence regularly for signs of wear or damage, addressing any issues promptly to maintain the overall appearance and integrity of the structure. By adhering to these maintenance practices, you can ensure that your wooden fence remains a lasting and attractive feature in your landscape for years to come.
Common Mistakes to Avoid in Fence Staining and Sealing
When maintaining a wooden fence through staining and sealing, several common mistakes can lead to subpar results or even damage the fence over time. One frequent oversight is selecting an incompatible stain or sealant for the type of wood used in the fence. Different woods require specific treatments; for instance, cedar and redwood are naturally resistant to weather conditions and may not need a penetrating stain but could benefit from a sealer instead. Another pitfall is failing to properly clean and prepare the surface before applying stain or sealant. Dirt, mildew, and old finish can inhibit adhesion and lead to an uneven application that doesn’t protect the wood effectively.
Additionally, homeowners often make the mistake of not following manufacturer instructions regarding product compatibility, application techniques, and drying times. Applying stain or sealant in direct sunlight or on a hot day can cause the finish to dry too quickly, resulting in a streaky or uneven coat. Similarly, applying multiple coats in one day without allowing sufficient drying time between can trap moisture beneath the layers, leading to peeling and blistering. It’s crucial to apply stain or sealant under ideal conditions, which typically means on a cool, overcast day, and to adhere to the manufacturer’s recommendations for optimal results. Regular maintenance, including annual inspections and cleaning, can prevent these mistakes and ensure that your wooden fence remains protected and attractive for years to come.