Introduction
Adding a fresh coat of stain to your wooden fence is an effective way to enhance curb appeal and protect your investment. This comprehensive guide delves into the intricacies of fence staining and sealing, equipping you with the knowledge to transform your outdoor space. From understanding the benefits and exploring various types of stains to mastering preparation, selection, and application techniques, we’ll take you through every step. Learn how to maintain the beauty and longevity of your stained fence, ensuring it remains a stunning focal point for years to come.
- Understanding Fence Staining: Benefits and Types
- Preparing Your Wooden Fence for Staining
- Choosing the Right Stain: Color Options and Applications
- Sealing Techniques: Protecting Your Fence Long-Term
- Step-by-Step Guide to Professional Fence Staining
- Maintenance Tips: Keeping Your Stained Fence Beautiful
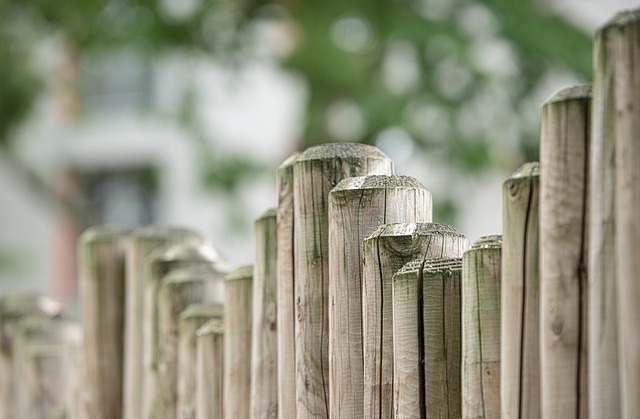
Understanding Fence Staining: Benefits and Types
Fence staining is a popular method to enhance the appearance and protect wooden fences. It involves applying a colored sealer or stain to the fence’s surface, which can transform its look while offering various functional advantages. The primary benefits include increased durability, as stains create a protective barrier against water, UV rays, and other environmental factors that contribute to wood decay. By blocking these elements, staining prolongs the life of your fence, reducing the need for frequent repairs or replacements.
There are numerous types of fence stains available, each with unique characteristics. Water-based stains are popular for their low odor and quick drying time, making them user-friendly. Oil-based stains, on the other hand, offer superior color intensity and protection against UV damage but may emit a stronger smell. Solid color stains provide a wide range of aesthetic options, while transparent or semi-transparent stains enhance the wood’s natural grain, ensuring a more subtle look. The choice depends on personal preference, desired visual effect, and specific climate conditions in your area.
Preparing Your Wooden Fence for Staining
Choosing the Right Stain: Color Options and Applications
When choosing a fence stain, one of the first considerations is color. Stains come in a wide array of options, from natural wood tones to vibrant hues, allowing you to personalize your fence’s appearance. Think about the overall aesthetic you desire – do you want to enhance the natural beauty of the wood or create a bold statement? Dark shades can make a fence appear more substantial and formal, while lighter tints can give it a more relaxed, rustic feel.
Additionally, consider the application method. Some stains are designed for brushing or rolling on, offering more control over coverage. Others are formulated for spraying, ideal for larger fences or those with intricate designs. The intended use of your fence will play a significant role in determining which type of stain and application method suits your needs best.
Sealing Techniques: Protecting Your Fence Long-Term
Sealing is an essential step in fence staining and maintenance, offering long-lasting protection for your wooden fences. There are various sealing techniques to choose from, each designed to suit different climates and wood types. Water-based seals are popular due to their low odor and quick drying time, making them ideal for regions with higher rainfall. These seals create a protective barrier against moisture, preventing rot and decaying. On the other hand, oil-based seals penetrate deep into the wood, enhancing its natural beauty while providing superior resistance against UV rays and extreme temperatures.
For optimal results, consider the local climate conditions and the type of wood in your fence. Regular sealing every 1-3 years will ensure your fence remains protected, preserving its appearance and longevity.
Step-by-Step Guide to Professional Fence Staining
Step-by-Step Guide to Professional Fence Staining
1. Preparation: Begin by cleaning the fence thoroughly, removing any dirt, debris, or old paint using a power washer or brush. Inspect the wood for damaged areas and patch as needed with putty or filler. Sand the fence gently to create a rough surface that aids in paint adhesion.
2. Application of Primer: Apply an appropriate wood primer designed for outdoor use using a brush or roller. This step is crucial, especially on old or untreated fences, as it helps the stain penetrate deeper into the wood fibers, enhancing durability and color absorption. Allow the primer to dry completely, usually within 24 hours, depending on the product and weather conditions.
Maintenance Tips: Keeping Your Stained Fence Beautiful
Regular maintenance is key to keeping your stained fence looking its best for years to come. After initial staining, apply a protective sealer every 1-2 years to shield the wood from elements like rain and UV rays, preventing fading and early deterioration. Regular cleaning with a soft brush or sponge and mild detergent will remove dirt and grime, preserving the vibrant color of your stain. Avoid using harsh chemicals or power washers, as they can strip away the finish. Keep an eye out for any damaged sections and repair them promptly to prevent further decay. Re-stain any areas that show signs of wear or fading to maintain an even, attractive finish. By following these simple steps, you’ll ensure your wooden fence remains a striking feature in your outdoor space.