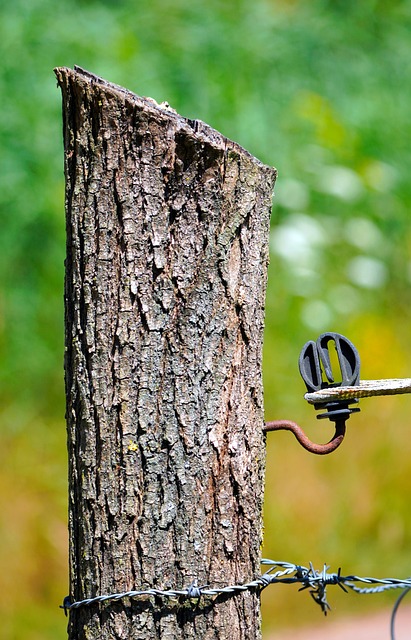
Fencing Off Time: The Ultimate Guide to Fence Staining and Sealing
A well-stained and sealed wooden fence is not just an aesthetic enhancement; it protects your investment from the elements, prolongs its lifespan, and adds curb appeal. This comprehensive guide delves into the intricacies of fence staining and sealing, equipping you with the knowledge to transform your wooden fence. From understanding the benefits and types of stains to application techniques, sealing strategies, and maintenance tips, we’ve got you covered for a job well done.
- Understanding Fence Staining: Benefits and Types
- Preparing Your Wooden Fence for Staining
- Choosing the Right Stain: Color and Formula
- Application Techniques for Optimal Results
- Sealing for Durability: When and How
- Maintenance Tips for Longevity and Beauty
Understanding Fence Staining: Benefits and Types
Fence staining is a popular method to enhance the appearance and protect wooden fences. It involves applying a pigmented sealer or finish to the fence’s surface, which can transform its look while offering various advantages. The process allows for a wide range of color options, enabling homeowners to choose a shade that complements their outdoor aesthetic. Not only does it add visual appeal, but staining also shields wood from the elements, preventing rot, mold, and fading.
There are several types of fence staining products available, each with unique characteristics. Water-based stains are environmentally friendly and easy to apply, offering a natural look. Oil-based formulas provide deeper colors and superior protection against moisture and UV rays but may take longer to dry. Semi-transparent coatings offer a balance between color enhancement and wood grain visibility, while solid color stains completely cover the existing finish, providing the most dramatic transformation.
Preparing Your Wooden Fence for Staining
Before applying any stain or sealant, it’s crucial to prepare your wooden fence thoroughly. Start by cleaning the fence to remove any dirt, dust, or debris using a pressure washer or a stiff brush. This step ensures that the surface is free from contaminants, allowing for better adhesion of the stain. After cleaning, inspect the wood for any damaged or rotten sections and repair them as needed. Filling in cracks and holes with wood putty or a suitable filler will create a smooth base for staining.
Next, sand the fence gently to roughen the surface slightly, enhancing paint or stain penetration. Use a fine-grit sandpaper to avoid causing excessive wear. Remove any dust that accumulates during sanding using a damp cloth or vacuum to ensure a clean, dry surface before proceeding to the next step.
Choosing the Right Stain: Color and Formula
Choosing the right stain is an essential step in enhancing your wooden fence’s appearance and longevity. The market offers a wide array of options, from solid colors to transparent finishes, each designed for specific purposes. Consider the type of wood you have and its natural color as a starting point. For example, lighter woods may look stunning with rich, deep tones, while darker timbers can be complemented by subtle, natural-looking shades.
The formula or composition of the stain is another critical factor. Some stains are water-based, offering easy application and minimal odor, while others are oil-based, providing deeper penetration and more durable protection. Oil-based stains tend to last longer but may require more time for cleanup. Water-based options are generally more environmentally friendly and suitable for those with health considerations.
Application Techniques for Optimal Results
For optimal fence staining and sealing results, the application technique plays a crucial role. Begin by preparing the surface thoroughly; this involves cleaning the fence to remove any dirt, grime, or existing stains. Sanding is another essential step, especially if the wood has seen better days, as it helps the new coat adhere better. Ensure even coverage during application—use a brush for corners and crevices, while a roller or sprayer is ideal for larger areas. For staining, apply in the direction of the grain to achieve a smooth finish. Sealing should follow the same technique, allowing each coat to dry as per the product’s instructions before applying the next.
Avoid common pitfalls like skipping preparation steps or not allowing sufficient drying time between coats. Overlapping each stroke slightly ensures an even blend, preventing visible brush strokes. Keep the surface wet during application with lighter coats for better absorption and a more consistent color. Remember, patience is key; taking your time will yield far better outcomes than rushing through the process.
Sealing for Durability: When and How
Sealing your wooden fence is an essential step to ensure its longevity and protect it from the elements. The process should be considered at regular intervals, depending on factors like exposure to sunlight, moisture, and foot traffic. Generally, sealing every 1-3 years is recommended for most outdoor wood.
The timing of sealing can vary based on your specific climate and fence conditions. In regions with frequent rain or high humidity, sealing might need to be done more frequently to prevent rot and mildew growth. Apply a high-quality water-repellent sealer using a brush, roller, or sprayer, ensuring even coverage. This protective layer will fill in pores and cracks, creating a barrier against moisture, stains, and UV rays, thus prolonging the life of your wooden fence.
Maintenance Tips for Longevity and Beauty
Regular maintenance is key to keeping your wooden fence looking its best and ensuring longevity. A simple cleaning routine can go a long way in preventing buildup and dirt from absorbing into the wood, which could eventually lead to rot or decay. Use a soft-bristled brush or sponge to gently clean the fence with mild soap and water, removing any loose debris or mildew.
For added protection, apply a fresh coat of sealant every one to two years, depending on exposure to elements. This will shield the wood from UV rays, moisture, and extreme temperatures, preserving its natural beauty and preventing premature aging. Consider seasonal checks to inspect for any signs of damage, rot, or insect infestation, addressing these issues promptly to maintain the fence’s structural integrity and aesthetic appeal.