Introducing the Art of Fence Staining and Sealing
Wooden fences, with their natural beauty, can enhance any outdoor space. However, maintaining their aesthetics is crucial. This article guides you through the process of fence staining and sealing, offering a durable solution for your wooden fence. From understanding the benefits and exploring various stain types to preparing your fence and choosing colors, we cover it all. Learn effective sealing techniques, follow a step-by-step guide, and discover maintenance tips to ensure your stained fence stands the test of time.
- Understanding Fence Staining: Benefits and Types
- Preparing Your Wooden Fence for Staining
- Choosing the Right Stain: Color Options and Application
- Sealing Techniques: Protection Against Elements
- Step-by-Step Guide to Professional Fence Staining
- Maintenance Tips: Extending the Lifespan of Your Stained Fence
Understanding Fence Staining: Benefits and Types
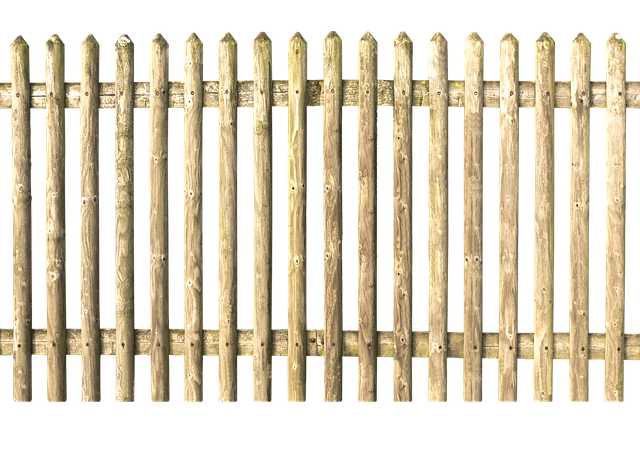
Fence staining is an art that enhances the beauty and durability of your wooden fence. By applying a protective coating, it not only adds a touch of aesthetics but also safeguards the fence from the elements. Staining involves infusing color and sealer into the wood grain, making it more weather-resistant and visually appealing. The benefits are manifold; it can protect against fading, cracking, and peeling caused by sun exposure and moisture, ensuring your fence remains in top condition for years.
There are various types of fence stains available, each offering unique characteristics. Water-based stains are popular due to their low odor and quick drying time. Oil-based stains, on the other hand, provide deeper colors and last longer but may take longer to dry. Solid color stains offer uniform coverage, while transparent or semi-transparent options allow the natural wood grain to peek through, creating a distinctive look. Choosing the right type depends on your personal preference for color, maintenance level, and desired protection.
Preparing Your Wooden Fence for Staining
Preparing your wooden fence for staining is a crucial step to ensure optimal results and the longevity of your fence. Begin by thoroughly cleaning the fence to remove any dirt, dust, or debris that may be present. Use a pressure washer or a stiff brush and mild detergent to achieve a clean surface. It’s essential to address any repairs or maintenance before staining. Fix any broken boards, replace missing sections, and sand rough spots to create an even base.
Once the fence is clean and repaired, lightly sand the entire surface to open the wood’s pores, allowing the stain to penetrate better. Remove dust and debris from sanding with a damp cloth. Check for stray nails or screws and ensure they are securely fastened, as these can cause issues during staining. By taking these preparatory steps, you’ll create a smooth, clean canvas that will enhance the beauty of your wooden fence when stained.
Choosing the Right Stain: Color Options and Application
When it comes to choosing the right fence stain, color plays a significant role in transforming your wooden fence into a beautiful and durable feature. There’s a vast array of options available, from rich, deep hues like mahogany and teak to subtle, natural shades akin to cedar. Consider the existing tone of your wood and the desired ambiance you wish to create—a bold statement or a more subtle, harmonious blend.
Application is another crucial factor. Some stains are designed for easy brush-on or spray application, while others require a more intricate rolling or staining process. Check the product instructions and consider your comfort level with the application method. Additionally, think about factors like weather conditions and desired coverage to ensure you choose a stain that aligns with your skills and the outcome you envision.
Sealing Techniques: Protection Against Elements
When it comes to protecting your wooden fence, sealing is a crucial step after staining. This additional layer acts as a barrier against the elements, ensuring your fence remains vibrant and durable for years to come. There are several sealing techniques available in the market, each offering unique benefits. Water-based sealers are popular choices due to their low odor and quick drying time, making them environmentally friendly and easy to apply. These sealers create a protective coating that repels water and protects against fading caused by UV rays.
On the other hand, oil-based sealers provide deeper penetration into the wood, enhancing its natural beauty while offering superior protection against mold, mildew, and insects. While they might have a stronger smell and longer drying time, oil-based sealers are highly effective in preserving the fence’s appearance and structure over extended periods. Choosing the right sealer depends on your climate, desired aesthetics, and maintenance preferences, ensuring your wooden fence stays protected and looking its best.
Step-by-Step Guide to Professional Fence Staining
Step-by-Step Guide to Professional Fence Staining:
1. Preparation is Key: Begin by inspecting your wooden fence for any signs of damage, rot, or old paint/stain. Repair or replace damaged sections before staining. Clean the fence thoroughly, removing dirt, debris, and existing stains with a pressure washer or brush. Allow it to dry completely. Mask off areas you don’t want stained, like adjacent structures or plants, using drop cloths or tape. Gather all necessary tools: a high-quality stain, brushes or rollers suitable for your fence’s size and material, a ladder (if needed), and protective gear.
2. Staining Process: Start at the top of the fence and work your way down, applying stain in even strokes using the brush or roller. Ensure complete coverage, but avoid over-saturating the wood to prevent drips and runs. Allow the first coat to dry according to the manufacturer’s instructions. Typically, this is 2-4 hours. Apply additional coats as needed for the desired color depth, following the same process and drying times between coats. For best results, allow the final coat to cure for at least 24 hours before sealing.
Maintenance Tips: Extending the Lifespan of Your Stained Fence
Regular maintenance is key to keeping your stained fence looking its best for years to come. Start by cleaning the fence annually to remove any built-up dirt, dust, or debris using a soft brush and mild detergent. This prevents the stain from wearing off prematurely. After cleaning, reapply a fresh coat of sealer every two to three years, depending on your climate and exposure to elements. A quality sealer will protect against UV rays, moisture, and extreme temperatures, ensuring the stain stays vibrant and the wood remains sealed.
Additionally, inspect your fence regularly for any signs of damage or fading. Promptly repair any broken boards or posts and touch up stained areas as needed. By combining regular cleaning, sealing, and repairs, you can significantly extend the lifespan of your stained wooden fence, maintaining its beauty and value over time.