Fence Staining and Sealing: A Comprehensive Guide to Revitalizing Your Wooden Fences
Transforming your outdoor space starts with enhancing your wooden fence. This guide delves into the art of fence staining and sealing, offering a step-by-step approach to revitalizing and protecting your fence. From understanding the benefits and diverse stain types to preparing your fence, choosing the perfect color, and applying the right seal, you’ll learn everything necessary for a stunning, long-lasting finish. Additionally, discover common mistakes to avoid, ensuring your fencing maintenance project is a success.
- Understanding Fence Staining: Benefits and Types
- Preparing Your Wooden Fence for Staining
- Choosing the Right Stain: Color Options & Application
- Sealing Your Stained Fence: Protection & Longevity
- Tools & Techniques for Effective Fencing Maintenance
- Common Mistakes to Avoid in Fence Staining & Sealing
Understanding Fence Staining: Benefits and Types
Fence staining is an art that enhances the beauty and longevity of your wooden fence. It’s more than just applying paint; it involves a process of sealing, protecting, and beautifying the fence’s surface. The primary benefits include increased durability, protection against elements like UV rays and moisture, and a fresh, attractive look. Staining also helps to preserve the wood, preventing rot and ensuring your fence remains robust for years to come.
There are various types of fence staining options available in the market today, each with unique properties and advantages. Water-based stains, for instance, offer excellent opacity and coverage while being environmentally friendly and easy to clean up. Semi-transparent stains allow some wood grain to show through, providing a natural look. Solid color stains offer complete coverage, ideal for those seeking a bold, uniform appearance. The choice ultimately depends on your personal preference, the fence’s existing condition, and the desired aesthetic outcome.
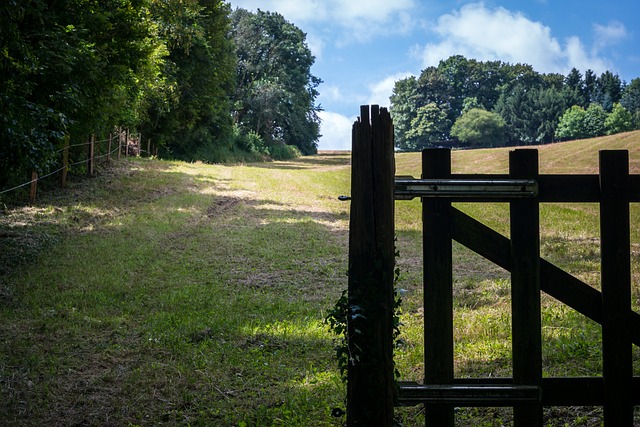
Preparing Your Wooden Fence for Staining
Before applying any stain or sealer, it’s crucial to prepare your wooden fence thoroughly. Start by cleaning the fence to remove any dirt, dust, and debris using a pressure washer or a brush and soapy water. This step ensures that the surface is free from contaminants, allowing for better adhesion of the stain. Next, inspect the wood for any signs of rot, cracks, or damaged boards. Repair or replace these areas to prevent further issues and ensure an even finish. Sanding the fence slightly can also help smooth out the surface and fill in any minor imperfections, providing a more uniform base for staining.
Choosing the Right Stain: Color Options & Application
When choosing a fence stain, the first step is to consider the color options available. A wide array of shades are designed to enhance the natural wood tones or create a bold new look. Popular choices include earthy browns, rich reds, and deep blues, each adding its own unique character to your wooden fence. The key is to select a color that complements your outdoor space and personal style.
Application is another vital aspect. Some stains are designed for a even, glossy finish while others offer a more natural, matte look. Read the product instructions carefully to understand the application process. Many modern stains come with easy-to-follow guidelines, ensuring a smooth and professional-looking finish once applied correctly.
Sealing Your Stained Fence: Protection & Longevity
After staining your wooden fence, the next crucial step is sealing it. Sealing provides an extra layer of protection against the elements, ensuring your stain stays vibrant and durable for longer. It acts as a barrier, preventing water, UV rays, and other environmental factors from penetrating the wood and causing damage.
Choosing the right sealer is essential. Water-based sealers are popular due to their low odor and quick drying time. Oil-based sealers, on the other hand, offer superior protection against stains and have a longer lifespan but may take longer to dry. Apply the sealer evenly using a brush or roller, following the manufacturer’s instructions for optimal results and longevity for your beautifully stained and sealed fence.
Tools & Techniques for Effective Fencing Maintenance
Maintaining your wooden fence is essential to preserve its beauty and longevity. The right tools and techniques can make this process much easier. Start by gathering the necessary equipment, such as a pressure washer, stain brush, roller, or sprayer, depending on the size of your fence and the desired finish. Always use high-quality paint or stain designed for outdoor use and suitable for wood to ensure optimal results and protection against the elements.
When it comes to techniques, power washing is a common step to remove dirt, mold, and mildew from the fence’s surface. After cleaning, apply a coat of primer if needed, followed by the chosen stain or paint. For intricate designs or panels, use a brush for precise application, while rollers or sprayers are ideal for larger, flat areas. Regular maintenance, including re-staining every few years, will keep your wooden fence looking fresh and protect it from weather damage.
Common Mistakes to Avoid in Fence Staining & Sealing
When staining and sealing your wooden fence, there are several common mistakes to avoid. One frequent error is not properly preparing the fence surface. This includes not sanding or cleaning the wood, which can lead to an uneven stain finish and reduced adhesion of the sealant. It’s crucial to remove any loose debris, dirt, and previous coatings before applying new stains or sealers.
Another mistake is selecting the wrong product for your fence’s needs. Different types of wood require specific types of stain and sealer. Using a product unsuitable for your fence material can result in fading, peeling, or other deterioration over time. Always choose products designed for the type and condition of your wood to ensure optimal protection and longevity.