DIY Fence Installation: A Comprehensive Guide for New Bedford Homeowners
Are you planning to enhance your New Bedford property with a new fence? This guide offers invaluable insights for do-it-yourself enthusiasts tackling this project. From understanding local regulations and mapping out your fence line to choosing durable materials and installing solid posts, each step is crucial for a successful and long-lasting installation. By following these tips, you’ll achieve a professional-looking fence that complements your home’s aesthetic while ensuring privacy and security. Get ready to transform your outdoor space!
- Planning Your New Bedford Fence: Consider Local Regulations and Property Lines
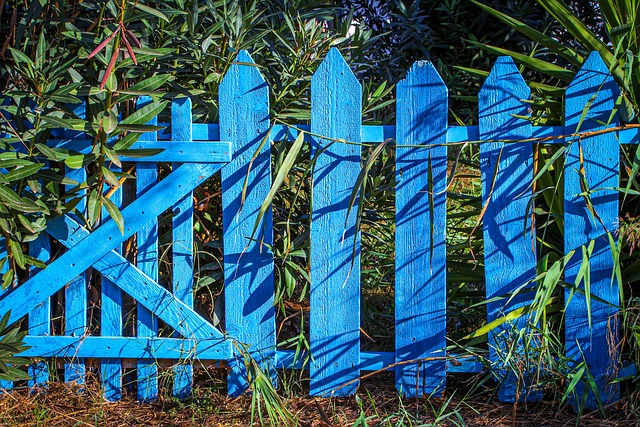
- Choosing the Right Material: Wood, Vinyl, or Metal for Your Climate
- Measuring and Mapping Your Fence Line: Accuracy is Key
- Digging and Marking Post Holes: Tips for Strong Post Installation
- Assembling and Installing Posts: Techniques for a Solid Foundation
- Attaching Railings and Panels: Final Touches for a Professional Look
Planning Your New Bedford Fence: Consider Local Regulations and Property Lines
Before you start planning and installing your new fence, take time to consider local regulations and property lines. New Bedford, Massachusetts has specific rules regarding fencing that you must adhere to, including restrictions on height, materials, and placement. Failing to comply with these regulations can result in fines or the requirement to remove the fence.
Additionally, it’s crucial to establish where your property lines end and a neighbor’s begins. Property line disputes can be costly and stressful, so clearly mark the boundaries before starting construction. Using stakes and string is an easy way to visually define the lines while ensuring you respect both your own and your neighbors’ property rights.
Choosing the Right Material: Wood, Vinyl, or Metal for Your Climate
Measuring and Mapping Your Fence Line: Accuracy is Key
Before you begin installing your DIY fence, taking precise measurements and creating a detailed map of your fence line is paramount. Even a small error in measurement can lead to significant issues down the line, from an ill-fitting fence to costly material waste. Start by walking the perimeter of your desired fence area, using a tape measure to record the exact distances between posts. Consider factors like curves, corners, and existing structures that might affect the straightness or shape of your fence line. Once you have all your measurements, plot them onto a drawing or use a mapping app to create a digital representation. This visual will serve as your guide throughout the installation process.
Digging and Marking Post Holes: Tips for Strong Post Installation
Before installing your fence posts, carefully plan where they will go and dig holes accordingly. Mark out the line of your fence with string or chalk to ensure straight and consistent placement. Digging holes that are too shallow can lead to weak post support, while holes that are too deep may prevent the posts from standing upright. The ideal depth for post holes is roughly one-third of the post’s height. Use a post hole digger to create holes that are wide enough to accommodate the bottom third of your posts and deep enough to secure them firmly in place with concrete.
Assembling and Installing Posts: Techniques for a Solid Foundation
When assembling and installing fence posts, homeowners in New Bedford should focus on creating a solid foundation. Begin by preparing the ground, ensuring it is level and compacted. Dig holes for each post, making sure they are deep enough to provide stability against various weather conditions. The depth should be at least one-third of the post’s height, and wider than the post’s diameter to allow for proper drainage and root growth if nearby trees or shrubs are present. Once holes are dug, place a concrete footing in each hole, allowing it to set and cure completely before proceeding. After the concrete has cured, carefully position the posts into the holes, ensuring they stand upright and level. Use wooden beams or braces temporarily to hold the posts in place until you secure them with concrete or other suitable fasteners.
Attaching Railings and Panels: Final Touches for a Professional Look
Once your fence is built and posts are secured, attaching railings and panels is the final step towards achieving a professional look. Start by ensuring all components are securely fastened to the posts using appropriate hardware. For railings, measure and cut them to the desired length, then attach them to the top of the posts with brackets or balusters, following manufacturer instructions for spacing and installation. Panels should be fitted snugly between the posts, with corners aligned precisely. Use latches or hinges to connect adjacent panels, allowing for easy removal if needed for maintenance or to accommodate future changes in landscape design. Regular cleaning and inspection will keep your fence looking its best and ensure all components remain securely attached.