DIY Fence Installation Tips for New Bedford, Massachusetts Homeowners
If you’re a New Bedford homeowner looking to enhance your property with a new fence, installing it yourself can be a rewarding and cost-effective project. This guide offers practical tips across four key sections: understanding your fence options specific to New Bedford yards, meticulous measuring and planning, gathering the essential tools and materials, and a step-by-step DIY building process. We also provide final tips for maintaining your new fence, ensuring longevity and aesthetic appeal.
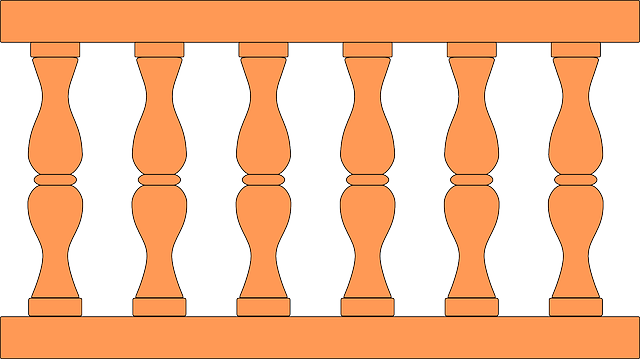
- Understanding Your Fence Options for New Bedford Yards
- Measuring and Planning Your Fence Installation
- Gathering the Right Tools and Materials
- Step-by-Step Guide to DIY Fence Building
- Final Tips for Maintaining Your New Fence
Understanding Your Fence Options for New Bedford Yards
When it comes to fencing your New Bedford, Massachusetts yard, homeowners have a variety of options to choose from. The first step is to consider the style that best fits your property’s aesthetic and functional needs. Privacy fences are popular in New Bedford, providing a barrier between your home and neighboring properties while allowing natural light to pass through. For those looking to define their yard’s perimeter, post-and-rail fences offer a classic, low-maintenance option.
Chain link fencing is another choice, ideal for areas requiring more security or where pets need containment. Wood fences add warmth and charm, with various types of wood available to suit different budgets and preferences. Vinyl fencing is maintenance-free and comes in numerous styles, making it versatile for any yard. Understanding these options will help guide your decision-making process as you plan your DIY fence installation project.
Measuring and Planning Your Fence Installation
Before you start installing your fence, it’s crucial to spend time measuring and planning the entire process. This step is fundamental for a successful DIY project. Begin by assessing the perimeter of the area where you want to install the fence. Use string or chalk to mark out the boundary, ensuring it aligns with your property lines. Take accurate measurements at various points, considering any curves or unique landscapes that might be present in New Bedford’s diverse terrain.
Next, decide on the layout and design of your fence. Consider factors like the number of gates or entry points needed, where you want to install them, and whether you prefer a solid fence or one with openings. Create a detailed plan, including scale drawings, to visualize the final result. This planning stage will help guide your material selection and ensure your fence installation in New Bedford, Massachusetts is both functional and aesthetically pleasing.
Gathering the Right Tools and Materials
When planning a DIY fence installation, New Bedford homeowners should start by gathering all the necessary tools and materials. This includes post holes diggers, power drills with various bits, measuring tapes, level tools, post supports or brackets, fence panels or pickets, hardware like nails or screws, concrete for filling holes (if applicable), and protective gear such as gloves and safety glasses.
Ensure you choose tools that are suitable for the job and consider renting equipment if needed. High-quality materials will make installation easier and ensure a durable, long-lasting fence. Always check local building codes and regulations before beginning construction to avoid any legal issues or unexpected complications.
Step-by-Step Guide to DIY Fence Building
Building a fence can be a rewarding DIY project for New Bedford homeowners looking to enhance their outdoor space. Here’s a step-by-step guide to help you navigate the process:
1. Plan and Measure: Start by assessing your property line and deciding on the fence’s style, height, and length. Use measuring tools to take accurate dimensions, ensuring you comply with local regulations. Choose materials like wood or vinyl based on your budget and desired aesthetic.
2. Gather Materials and Tools: Based on your measurements, create a detailed list of what you need, including posts, rails, fencing panels, concrete for setting the posts, and tools such as a post-hole digger, saw, hammer, level, and screw driver. Ensure you have all the necessary components before beginning construction.
3. Prepare the Ground: Mark out the fence line clearly. Dig holes for the posts, ensuring they are deep enough (typically one-third to half the post’s height) and filled with concrete for stability. Allow the concrete to set completely.
4. Assemble the Fence: Attach rails to the posts using brackets or screws. Secure fencing panels to the rails, following manufacturer instructions. Ensure each section is level before moving on to the next.
5. Final Touches: Once all sections are installed, double-check for gaps and make adjustments as needed. Add any desired finishing touches, such as a gate or decorative elements, ensuring they are securely attached.
Final Tips for Maintaining Your New Fence
After successfully installing your new fence, regular maintenance will ensure it remains sturdy and attractive. Start by cleaning the fence annually with a pressure washer to remove any buildup of dirt or debris. This also helps in inspecting for any loose or damaged boards, which can be replaced promptly.
Apply a fresh coat of paint or sealant every couple of years to protect the wood from the elements. This simple step goes a long way in preserving the fence’s appearance and longevity. Regular trimming around the fence line keeps plants and shrubs from encroaching, further safeguarding the fence’s structure.