Discover the art of DIY as you enhance your New Bedford property with a sturdy and aesthetically pleasing fence. Our comprehensive guide walks you through understanding local regulations, selecting durable materials tailored to New Bedford’s climate, and planning an efficient layout. With an arsenal of tools and supplies at hand, and a detailed installation guide at your fingertips, you’ll master the process from start to finish. Moreover, we’ll provide essential maintenance tips to ensure your fence endures and maintains its appeal for years to come. Whether you seek privacy, security, or a touch of curb appeal, this article is your gateway to expertly crafting the perfect fence for your Massachusetts home.
- Understanding Local Regulations
- Selecting the Right Materials for New Bedford's Climate
- Planning Your Fence Layout Efficiently
- Tools and Supplies Required for Installation
- Step-by-Step Installation Guide for Homeowners
- Maintenance Tips to Keep Your Fence in Top Condition
Understanding Local Regulations
Before embarking on a DIY fence installation project in New Bedford, Massachusetts, it is crucial to familiarize oneself with the local regulations that govern such endeavors. Homeowners must first consult the city’s Zoning Ordinance and Building Codes to ensure compliance with setback requirements, height limitations, and property line constraints. These regulations are designed to maintain aesthetic standards, protect privacy, and ensure the safety of all residents. For instance, fences within certain zones may be subject to specific materials and styles that harmonize with the neighborhood’s character.
Additionally, obtaining the necessary permits is a critical step in the process. The City of New Bedford requires that homeowners submit an application for a building permit before any construction begins. This application should include detailed plans of the proposed fence, illustrating its dimensions, design, and location relative to property lines and any adjacent structures. The permitting process also involves checking for underground utilities to avoid potential complications during installation. Understanding these local regulations not only ensures legal adherence but also helps in avoiding costly mistakes or the need for expensive alterations after the fact. It is always advisable to reach out to the city’s planning department or a licensed surveyor to confirm all requirements and regulations pertinent to your specific project.
Selecting the Right Materials for New Bedford's Climate
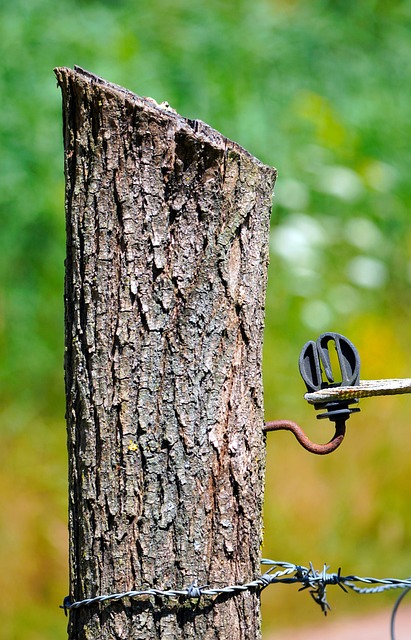
When embarking on a DIY fence installation in New Bedford, Massachusetts, selecting the right materials is crucial to withstand the area’s unique climate. The coastal location of New Bedford means that your fence will be exposed to salty air and high winds from the Atlantic Ocean, which can rapidly accelerate wear and tear on less durable materials. For longevity, consider rot-resistant woods like cedar or redwood, which naturally resist the decay that damp, salty conditions can cause. Alternatively, composite and vinyl fencing options are low maintenance and designed to endure harsh environmental factors without succumbing to the corrosive effects of the sea air.
Moreover, materials like pressure-treated pine are often treated with chemicals to resist rot and insects, making them a suitable choice for New Bedford’s climate. However, it’s essential to opt for a high-quality treatment as cheaper alternatives may not provide the long-term protection needed. For those prioritizing aesthetics alongside durability, there are also attractive options like aluminum and steel fencing, which offer modern designs with minimal upkeep. Whichever material you choose, ensure it aligns with both your budget and the aesthetic you envision for your property, all while being capable of standing up to New Bedford’s maritime environment over time.
Planning Your Fence Layout Efficiently
Before embarking on a DIY fence installation in New Bedford, Massachusetts, meticulous planning is paramount to ensure your layout is both efficient and compliant with local regulations. Start by clearly defining your purpose for the fence; whether it’s for privacy, security, or to define property lines, this will guide your decisions throughout the process. Consult your city’s ordinances to understand setback requirements, allowed heights, and any permits necessary for construction.
Once you have a grasp of the legalities, use stakes and strings to mark out your proposed fence line directly on your property. This physical representation will help you visualize the layout and make any necessary adjustments before any ground is disturbed. Employ a laser level or a string level to ensure the fence’s straightness and alignment with property boundaries. Utilize online tools and software that allow you to input your property dimensions and view a virtual representation of your proposed fence, which can be particularly useful if your property has complex shapes or topography. By planning your fence layout efficiently, you’ll set a solid foundation for a successful DIY installation project, ensuring that the end result not only meets your needs but also harmonizes with the neighborhood’s aesthetic and respects your neighbors’ rights. Remember to account for gate locations and access points during this phase, as these will affect the overall design and functionality of your fence.
Tools and Supplies Required for Installation
When embarking on a DIY fence installation project in New Bedford, Massachusetts, having the right tools and supplies is crucial for efficiency and safety. The essential tools include a tape measure for precise measurements, a shovel or post-hole digger for digging holes, a level to ensure posts are upright, a hammer for securing fence posts, and a saw for cutting wood or metal to size. For vinyl or chain link fences, a rubber mallet may be preferred over a hammer to avoid damaging the materials. Additionally, you’ll need a set of wrenches and pliers for tightening hardware such as brackets, hinges, and gate latches. A string line and nail or a chalkline and chalk can help lay out the fence line accurately.
Supplies-wise, you’ll require fence posts or fence panels, concrete mix for setting posts, ground stakes to mark boundaries, and the necessary hardware including rail caps, hinges, gate latches, and post caps. If you’re installing a wooden privacy fence, also consider wood treatment or stain to protect your investment from New England’s harsh weather conditions. For gates, ensure you have hinges suitable for the weight and size of the gate. Depending on local regulations in New Bedford, you may also need to obtain a permit before beginning work. Always double-check with local ordinances to ensure compliance with setback requirements, height restrictions, and other zoning considerations. With all these tools and supplies at the ready, homeowners can embark on their fence installation with confidence.
Step-by-Step Installation Guide for Homeowners
Embarking on a DIY fence installation in New Bedford, Massachusetts involves careful planning and execution to ensure compliance with local regulations, as well as the durability and longevity of your fence. Before starting, verify the town’s ordinances regarding height restrictions, setback requirements, and permits needed for construction. With these details confirmed, you can proceed with the installation process.
Begin by marking the property lines using stakes and string to ensure your fence aligns with legal boundaries. Clear the intended path for your fence, removing any obstructions that may interfere with post hole digging or installation. Select a consistent depth for post holes, typically 24 inches for an above-ground fence, and slightly deeper if you plan for underground wiring or posting. Use a post hole digger to create the holes, ensuring they are evenly spaced to support the fence’s structure. For additional stability, consider concrete footings; mix concrete according to package instructions and pour it into each hole, inserting a post into place as it sets. Wait for the concrete to fully cure before proceeding to attach fence panels or pickets. Align the first panel at an corner, securing it to the posts with galvanized nails or screws. Continue this process along the entire length of the fence, ensuring each panel is level and securely fastened. Use a spirit level for precision, and where necessary, adjust the ground level to maintain an even finish. Upon completion, check the entire fence for stability and integrity before applying a coat of protective stain or paint to shield it from New England’s harsh weather conditions. Regular maintenance will ensure your DIY fence stands as a durable boundary for years to come.
Maintenance Tips to Keep Your Fence in Top Condition
Regular upkeep is key to maintaining your DIY installed fence’s longevity and appearance. Begin by thoroughly inspecting your fence annually for any signs of wear, such as splintered wood, loose nails or screws, or sections that have shifted out of place. Address these issues promptly to prevent more extensive damage. Clean your fence regularly with a soft-bristled brush or a pressure washer set to a low-pressure mode to remove dirt, pollen, and other debris that can mar its finish. After cleaning, apply a fresh coat of stain or paint as recommended by the manufacturer, especially after the fence has been power washed, to protect it from the elements.
For wooden fences, consider sealing the wood with a waterproof sealant once every two to three years, depending on exposure to harsh weather conditions. This will help to prevent warping and rotting. If your fence has metal components, such as hinges or hardware, lubricate them with a suitable oil or grease bi-annually to ensure they remain smooth and functional. Keep vegetation trimmed away from the fence to avoid providing a moist environment for mold or fungus growth. Lastly, be proactive about repairing any damage, such as broken slats or posts, immediately to prevent further deterioration that could compromise the integrity of your fence.